中关村win7运行游戏后系统变卡的提速技巧
时间:2016-01-07 13:10
小编:易激活
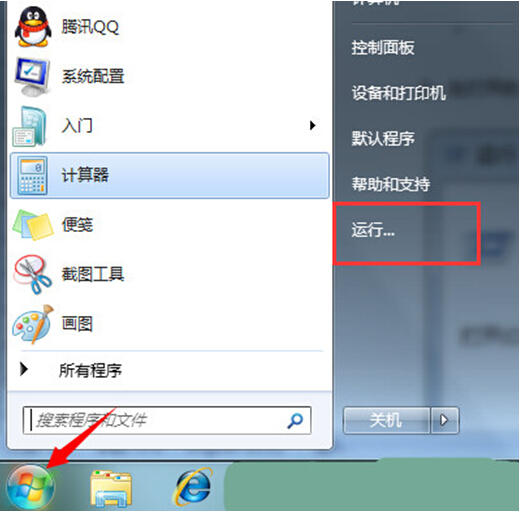
1、在win7系统下,单击“开始”菜单,在窗口中找到并点击 “运行”选项;
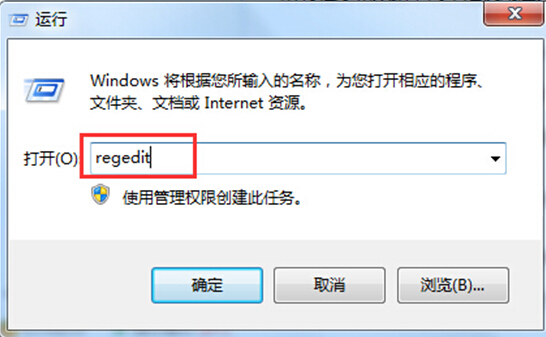
2、在打开的“运行”窗口下,我们输入“regedit” ,点击“确定“;
3、打开注册表编辑器后,依次展开:[HKEY_LOCAL_MACHINESYSTEMCurrentControlSetControlSessionManagerMemoryManagement]。在右侧窗口中找到“DisablePagingExecutive”;
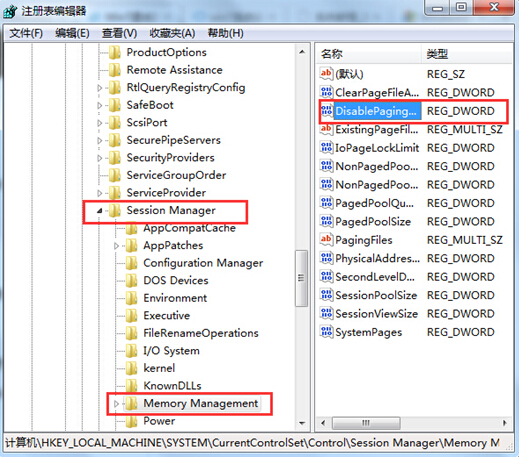
4、双击DisablePagingExecutive 把值改为1(十六进制),确定;

5、采用同样的方式,我们找到LargeSystemC符串值双击后也将数值改为1(十六进制)即可。 在完成以上系统教程之后,童鞋们别忘了重启下Win7系统,然后测试游戏退出后运行速度是否得到了提升。想要通过修改注册表的方式来提升运行速度的用户不妨跟着以上步骤进行设置,希望给大家带来帮助。